- Create ubuntu container
- Use three network interface, mgmt, sniff-0, sniff-1. mgmt has vmbr1 with vlan tag 999. other are vmbr0 and vmbr1 with no ip address.
- Follow the installation guide for debian and ubuntu.
- Instead of
1.1.1.1give the ip address of192.168.9.102for management interface during installing and configuring httpd/apache service.
Add Node
- Visit it on port 443 and enter admin:admin
Click **Nodes > Add NIDS**

- **Node Name**: `owlh-node`
- **Node IP**: `192.168.9.102`
- **Node user**: `admin`
- **Node Port**: `50002`
- **Node password**: `admin`
Suricata rules file
Configure Suricata on the OwlH Node
nano /etc/suricata/suricata.yamlBash
- eve-log:
      enabled: yes
      filetype: regular #regular|syslog|unix_dgram|unix_stream|redis
      filename: eve.json
YAML
Ensure eve.json output is enabled
af-packet:
  - interface: sniff-0
    cluster-id: 100
    cluster-type: cluster_flow
    defrag: yes
    use-mmap: yes
    tpacket-v3: yes

  - interface: sniff-1
    cluster-id: 101
    cluster-type: cluster_flow
    defrag: yes
    use-mmap: yes
    tpacket-v3: yes

  - interface: eth0
    cluster-id: 99
    cluster-type: cluster_flow
    defrag: yes
    use-mmap: yes
    tpacket-v3: yes
YAML
Note the ‘sniff-prod’ and ‘sniff-sec’ interfaces
default-rule-path: /var/lib/suricata/rulesYAML
Point to a fake rules file, as OwlH will be managing the rules for Suricata
We are now finished editing the suricata.yaml file. Please close the file and save your changes.
Add a Cron Job to Trim Suricata Logs
crontab -eBash
# Run every day at 0400
# Find files older than 30 days and delete
0 4 * * * find /var/log/suricata -maxdepth 1 -mtime +30 -type f -exec rm -f {} \; > /dev/null
Plain text
Add these cron jobs below any existing ones
When finished — assuming you’re using nano — press CTRL + x and then y to save and exit the crontab.
Create a Suricata Ruleset in the OwlH Manager
The ruleset in Suricata is the collection of rules that will be pushed to any NIDS node(s) in order to detect network anomalies. Once you download individual rulesets, you will put them into a collection and push them to your NIDS node.
Select Rule Sources
Log into the OwlH Manager at https://owlh-manager-ip-address

Download Rules
Click Open Rules > Manage Rulesets Sources > Add new ruleset source.
Under Select Ruleset Type, choose Defaults.
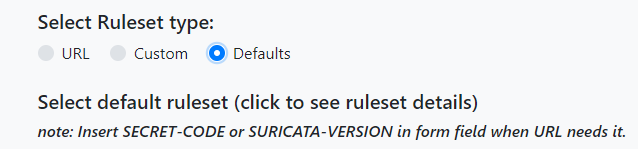
=
ℹ️
Some rulesets will require additional information – such as the Suricata version.
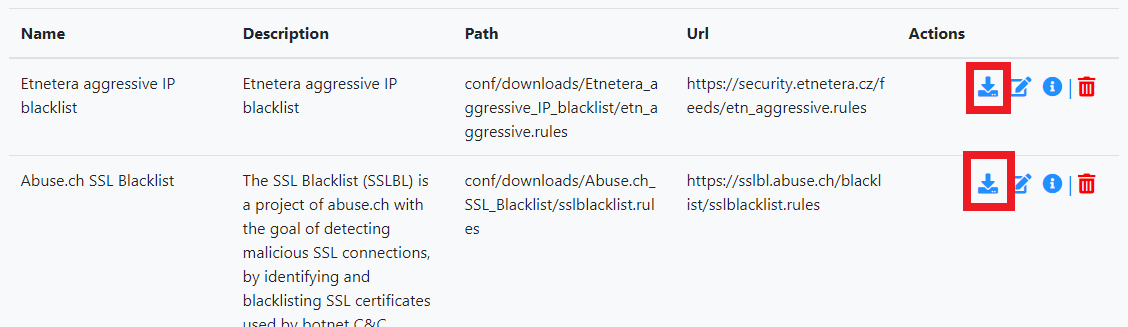
⚠️
This process must be done 1 by 1 for any ruleset. You cannot pick multiple rules at the same time.
Repeat the process as many times as needed. Choose a ruleset – free or paid. Click Open Rules again and repeat this process of downloading Suricata rules until you’ve downloaded all of your desired rules.
Define Packet Capture Interfaces in Service Configuration

Click Nodes > Node services configuration (on your desired node) > Choose Suricata > Add Suricata
ℹ️
You have to do this for each interface, as there is no multi-select
Finish adding the first interface. Then, repeat this process to add the next interface.
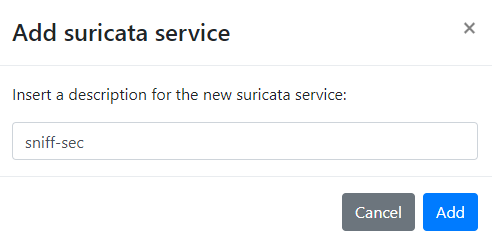
Using sniff-sec as an example here
Click Add > Click the edit button

- Description:
sniff-sec - Ruleset:
Choose your ruleset - Interface:
Choose your interface - Configuration file:
/etc/suricata/suricata.yaml - Click Save
Click the Sync Ruleset button and click the Start Service button. It might throw an error, but refresh the page and wait a few moments.
ℹ️
Again, do this for every interface you intend to capture on
Verify the Suricata Process(es) Started
Log onto the OwlH Node container and run this command:
ps aux | grep -i suricata | grep -v grepBash
You should see something similar to this:
root        2230  0.0 18.2 1688308 766312 ?      Rsl  23:45   0:37 /usr/bin/suricata -D -c /etc/suricata/suricata.yaml -i sniff-prod --pidfile /var/run/2b725740-e8bd-3dd0-18ac-e4e455409932-pidfile.pid -S /etc/suricata/rules/The-Rulez.rules

root        2294  0.0 17.8 1221432 748164 ?      Rsl  23:45   0:37 /usr/bin/suricata -D -c /etc/suricata/suricata.yaml -i sniff-sec --pidfile /var/run/48f13efb-74c8-2578-a7dc-d19eae40002e-pidfile.pid -S /etc/suricata/rules/The-Rulez.rules
Now, click Nodes > Select your node > Node services configuration > Zeek. Then, click the button to enable Zeek management.

Click node.cfg. This is where you configure the interfaces and instance type. You are editing this file remotely from the web browser. Delete everything from the configuration file and add these lines instead.
Be sure to replace owlh-node-container-ip with your OwlH node’s IP address
# Example ZeekControl node configuration.
#
# This example has a standalone node ready to go except for possibly changing
# the sniffing interface.
[logger]
type=logger
host=localhost

[manager]
type=manager
host=192.168.9.102

[proxy-1]
type=proxy
host=localhost

[worker-1]
type=worker
host=localhost
interface=sniff-0

[worker-2]
type=worker
host=localhost
interface=sniff-1
Click Save and click Deploy. You should get a visual confirmation that Zeek has started. You can also verify by running this command on the OwlH Node:
Add Cron Jobs to Trim Stale Zeek Logs
Run these commands on the OwlH Node container. I am trimming logs older than 30 days. You can adjust your timeframe as required for your environment.
crontab -e# Run every day at 0400
# Find directories older than 30 days and recursively delete
0 4 * * * find /usr/local/zeek/logs -type d -mtime +30 -exec rm -rf {} \; > /dev/null 2>&1Add these cron jobs below any existing ones
When finished — assuming you’re using nano — press CTRL + x and then y to save and exit the crontab.
Install the Wazuh Agent to Send NIDS Alerts to the Wazuh Server
Install Wazuh Agent on the OwlH Node Container
Run these commands on the OwlH Node container:
- Took this command from wazuh ui
wget https://packages.wazuh.com/4.x/apt/pool/main/w/wazuh-agent/wazuh-agent_4.10.1-1_amd64.deb && sudo WAZUH_MANAGER='192.168.9.101' WAZUH_AGENT_NAME='owlh-standalone' dpkg -i ./wazuh-agent_4.10.1-1_amd64.deb
sudo systemctl daemon-reload sudo systemctl enable wazuh-agent sudo systemctl start wazuh-agent
curl -k -u admin -X POST "https://192.168.9.101:443/api/saved_objects/_import" -H "osd-xsrf: true" --form file=@/tmp/owlhfilebeat/owlh-kibana-objects-20191030.ndjson
curl -k -u admin -X PUT -H 'Content-Type: application/json' 'https://localhost:9200/_template/owlh' -d@/tmp/owlhfilebeat/owlh-templa
te.json
ovs-vsctl -- --id=@p get port veth302i1 -- --id=@m create mirror name=owlhProd select-all=true output-port=@p -- set bridge vmbr0 mirrors=@m
ovs-vsctl -- --id=@p get port veth302i2 -- --id=@m create mirror name=owlhSec select-all=true output-port=@p -- set bridge vmbr1 mirrors=@m
# Run every minute (no need for redundant @reboot job)
# Check to Ensure that Port Mirroring is configured
# The || condition on the right is triggered if the command on the left fails
# Effectively, attempt to start the NIDS container and create the port mirror  if the mirror config doesn't exist

# Production Switch / Sniff-0
* * * * * ( /usr/bin/ovs-vsctl get Mirror owlhProd name 2>/dev/null 1>/dev/null ) || ( /usr/sbin/pct start 302 2>/dev/null ; sleep 1 ; /usr/bin/ovs-vsctl -- --id=@p get port veth302i1 -- --id=@m create mirror name=owlhProd select-all=true output-port=@p -- set bridge vmbr0 mirrors=@m )

# Security Switch
* * * * * ( /usr/bin/ovs-vsctl get Mirror owlhSec name 2>/dev/null 1>/dev/null ) || ( /usr/sbin/pct start 302 2>/dev/null ; /usr/bin/ovs-vsctl -- --id=@p get port veth302i2 -- --id=@m create mirror name=owlhSec select-all=true output-port=@p -- set bridge vmbr1 mirrors=@m )